Difference between revisions of "OXP howto model"
(→Export the model) |
Cholmondely (talk | contribs) (Added a_c's comments) |
||
| (24 intermediate revisions by 5 users not shown) | |||
| Line 1: | Line 1: | ||
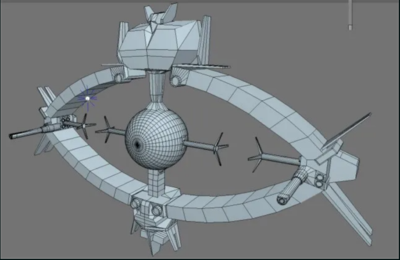
| + | [[File:Untextured Odyssey.png|thumb|right|400px|Maaarcooose's finished model of the Odyssey, prior to texturing]] |
||
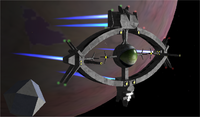
| + | [[File:U31 odyssey.png|thumb|right|200px|Textured Odyssey]] |
||
== Create your model == |
== Create your model == |
||
| − | in Wings3D or a similar program. |
+ | in [http://www.wings3d.com/ Wings3D] or a similar program. |
| − | How you do this is up to your creativity, but following a few tutorials for Wings3D and Meshwork and the [http://oolite.aegidian.org/cyoship2/ 'brickship tutorial'] or [http://oolite.aegidian.org/cyoship/ 'Oogie ship'] by Aegidian are highly recommended if you are not familiar with 3D modeling. |
||
| − | == Export the model == |
||
| + | *For Blender specifically see [http://aegidian.org/bb/viewtopic.php?f=4&t=10041 Blender 3d Modeling Tutorials] (2011) - and see also [https://cgcookie.com/learn-blender cgcookie.com] |
||
| + | |||
| + | How you do this is up to your creativity, but [[User:Aegidian|Aegidian]] has created the following tutorial for Wings3D. |
||
| + | |||
| + | {| align="center" valign="top" style="border-spacing:5pt;" |
||
| + | |- valign="top" |
||
| + | | [[Image:Sv_wings_mode_object.png|128px]] |
||
| + | | Launch Wings3D and select the object mode. |
||
| + | |- valign="top" |
||
| + | | [[Image:Sv_wings_menue_object_cube.png|128px]] |
||
| + | | Right-click in the workspace to pop up the '''object menu'''. Select the options for the cube. |
||
| + | |- valign="top" |
||
| + | | [[Image:Sv_wings_options_cube.png|128px]] |
||
| + | | Cubes created by Wings3D measure one unit on a side. In Oolite these units are meters and a 1m x 1m x 1m spaceship is a bit small, so we're going to scale it to 30m wide, 10m tall, and 30m long.<br><br> You'll need to dolly the camera away from your object a bit to be able to see it all in the view now. I use the scroll-wheel to do this, but ctrl-alt-[left mouse button] and up or down will also work.<br><br>Another approach is to create the standard sized cube and Right-click and choose '''.Scale Axis'''. Choose the '''.X'''. axis then press tab to allow numeric input, this is a percentage, so enter 3000 to scale the objects x-axis dimension to 30m. Do the same scaling on the '''.Y''' axis, scaling by 1000%. and on the '''.Z'''. axis scaling by 3000%. |
||
| + | |- valign="top" |
||
| + | | [[Image:Sv_wings_workspace_cube.png|128px]] |
||
| + | | This gives us our basic shape, 30m wide by 30m long by 10m high.<br>Now some details, we'll add a bevel for the front viewscreen and some fins. |
||
| + | |- valign="top" |
||
| + | | [[Image:Sv_wings_mode_edge.png|128px]] |
||
| + | | First the bevel, select the '''edges''' mode and press space to clear the current selection. |
||
| + | |- valign="top" |
||
| + | | [[Image:Sv_wings_workspace_cube_edge.png|128px]] |
||
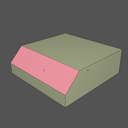
| + | | Select the upper front edge, Right-click to pop up the menu and choose '''Bevel'''.<br><br>Move the mouse until you've got the right look, then left-click to set the bevel. You can also press tab to allow numeric entry of the bevel amount again. |
||
| + | |- valign="top" |
||
| + | | [[Image:Sv_wings_workspace_cube_bevel.png|128px]] |
||
| + | | Voila. The first step is done. Next the fins. These will be a bit trickier. |
||
| + | |- valign="top" |
||
| + | | [[Image:Sv_wings_workspace_cube_edgeB.png|128px]] |
||
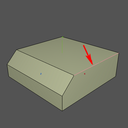
| + | | Select '''edges''' mode again and press space to clear the selection.<br><br>Then choose one of the two upper edges going from front to back. |
||
| + | |- valign="top" |
||
| + | | [[Image:Sv_wings_options_cut.png|128px]] |
||
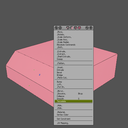
| + | | Right-click for the menu and then choose '''.Cut''' and choose '''2 2''' to cut the line into two pieces.<br><br>Do the same for the line on the other side. You'll find yourself in '''points''' mode, with the indicated point selected. |
||
| + | |- valign="top" |
||
| + | | [[Image:Sv_wings_mode_face.png|128px]] |
||
| + | | Now we need a quick trick to make life easier - choose '''faces''' mode and press '''command-a''' to select all faces. |
||
| + | |- valign="top" |
||
| + | | [[Image:Sv_wings_workspace_allfaces_tesselate.png|128px]] |
||
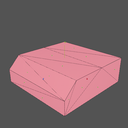
| + | | Right-click and choose '''Tesselate''' and then '''Triangulate''', which will make turn all the flat faces into bunches of triangles. |
||
| + | |- valign="top" |
||
| + | | [[Image:Sv_wings_workspace_tesselated.png|128px]] |
||
| + | | |
||
| + | |- valign="top" |
||
| + | | [[Image:Sv_wings_workspace_cube_edgeC.png|128px]] |
||
| + | | Return to '''edges''' modes and select the two edges to become fins. |
||
| + | |- valign="top" |
||
| + | | [[Image:Sv_wings_options_extrude_normal.png|128px]] |
||
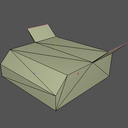
| + | | Right-click and choose '''.Extrude''' and '''Normal''' and move the mouse until you are pleased. |
||
| + | |- valign="top" |
||
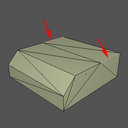
| + | | [[Image:Sv_wings_workspace_flying_brick.png|128px]] |
||
| + | | Tadaa! A flying brick. |
||
| + | |} |
||
| + | |||
| + | |||
| + | [[File:Sv_textut_part_1_01.png|thumb|right|100px|pic 1]] |
||
| + | [[File:Sv_textut_part_1_02.png|thumb|right|100px|pic 2]] |
||
| + | [[File:Sv_textut_part_1_03.png|thumb|right|100px|pic 3]] |
||
| + | [[File:Sv_textut_part_1_04.png|thumb|right|100px|pic 4]] |
||
| + | [[File:Sv_textut_part_1_05.png|thumb|right|100px|pic 5]] |
||
| + | [[File:Sv_textut_part_1_06.png|thumb|right|100px|pic 6]] |
||
| + | [[File:Sv_textut_part_1_07.png|thumb|right|100px|pic 7]] |
||
| + | If you've read the tutorial above it's time to think about a few more things. |
||
| + | |||
| + | == Optimize == |
||
| + | Optimizing models and textures for a game is no fun, specially if it's a model with lots of greebles and funny details. |
||
| + | |||
| + | === Simple example === |
||
| + | So let's stick with a simple example - a simple cone combined with a cube. When creating the UV-Map in Wings3D this map is really in no way optimized. Doing optimizations as postprocess is a real pain, believe me .-) |
||
| + | |||
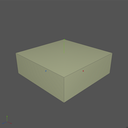
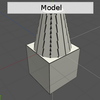
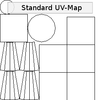
| + | Let's say you have created a model in Wings3D ('''pic 1''') and created the UV-Map ('''pic 2'''). You can see that Wings3D does some preparations for you, e.g. the UV information is taking place in the maps area and the polygons are separated (in chunks), based on the method you've used to create the UV-Map. It's a good starting point but far away from a optimum for a game. |
||
| + | |||
| + | === Wasted texture informations === |
||
| + | You can see in a few OXPs background images in the UV-Maps ('''pic 3'''). This is just wasted texture information, results in bigger filesizes and and makes optimization tools pretty senseless. These tools are using Deflate, LZ77, RLE (Run-length_encoding) and other algorithms to optimize the texture information streams in the maps. Better use a solid color (black, grey or white). |
||
| + | |||
| + | === Wasted faces === |
||
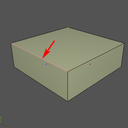
| + | Wings3D is a box-modeller and creating objects in Wings3D always results in closed objects. Result is that quite a few faces are just wasted ('''pic 4'''), because they are not visible at all, but still eating memory and processing time. This can easily go in a few thousands of faces when a lot of models are used in installed OXPs. Luckily there's a way as Wings3D provides a hole material. This is a special feature to reduce the amount of data when exporting the model as .obj as the faces won't appear in the exported model and UV-Map. |
||
| + | |||
| + | === Resort the map === |
||
| + | The next step is to resort (and sometimes scale) the polys in the UV-Mapper. Best practice is to leave a little bit space between polys ('''pic 5'''). This is a lesson I had to learn with my models. I was always wondering why some artifacts appeard at the edges and why the mipmapping doesn't work properly. |
||
| + | |||
| + | === Mipmapping === |
||
| + | To get it working properly expand the areas with real texture information by a few pixels ('''pic 6'''). Oolite will do the mipmapping (if its available) automagically. Mipmapping or Level of Detail (LOD) is a antialiasing technique to improve the quality when textures are minified / magnified. See [http://en.wikipedia.org/wiki/Mipmap Mipmap] for more infos. |
||
| + | |||
| + | ===Tesselation is evil === |
||
| + | And last but not least tesselation (or subdivision) is evil if its used to smooth objects appearance. We can see it in a growing number of released OXPs, and it is really the worst case. Tesselation ('''pic 7''') is a time eater for a game as it increases vertex and face counts a lot and often enough results in higher texture sizes. Both are adding time to the setup of entities whenever they are spawned in the game. Oolite handles smooth groups and hard/soft edges so in most cases there is absolutely no need to raise v/f counts. A really simple example how to use the smoothing option in combination with materials entries in Oolite can be found in the [[RVandGS|RVandGS.oxp]]. |
||
| + | |||
| + | ===Details and Greebles=== |
||
| + | Another point to consider is if a detail has to be done in the model itself or if this can be placed in a [[Materials_in_Oolite#Important_concepts|normal map]]. |
||
| + | |||
| + | |||
| + | == Export the model == |
||
to obj( mtl texture) and convert to *.dat format. |
to obj( mtl texture) and convert to *.dat format. |
||
| + | [[Image:Obj2dattex.png|none|left|400px|3 steps]] |
||
| − | There's a cross platform command line script, [http://svn.berlios.de/svnroot/repos/oolite-linux/trunk/tools/meshConverters/Obj2DatTex.py '''Obj2DatTex.py'''] that converts .obj to .dat - it needs python.org's python 2.6.x language installed in order to run. |
||
| + | The picture above shows 3 simple steps to export the model and use one of the converter scripts to get the .dat file. |
||
| − | Ensure you've got a copy of Obj2DatTex.py inside the same directory as the files you want to convert, then, using your computer command line: |
||
| + | * If you have the Wings stuff ready for export (means a model with UV-Map), simply use the Wavefront (obj) exporter ('''Step 1+2'''). You'll need to configure it as shown in '''Step 2'''. Once exported you have three files (.obj, .mtl and .png). |
||
| + | * Copy the <code>Obj2DatTexNorm.py</code> to your folder where the model has been saved to. |
||
| + | * Open a shell and switch to the folder with the model (and script) and type in: <code>Obj2DatTexNorm.py mymodel.obj</code> ('''Step 3'''). |
||
| − | cd <the directory/folder where the .obj file is> |
||
| + | Please note that the converter script [[Oolite_Converters|Obj2DatTexNorm.py]] needs Python 2.7 or higher (but doesn't work out of the box with 3.x!!). There is still <code>Obj2DatTexNorm.py</code> available which will work with Python 2.5, but the recommended tool is <code>Obj2DatTexNorm.py</code>. |
||
| − | Obj2DatTex <name of the .obj file to convert> |
||
== Edit [[shipdata.plist]] == |
== Edit [[shipdata.plist]] == |
||
| Line 23: | Line 116: | ||
*Exhausts: although they are defined seperate from subentities, they can be regarded as subentities. |
*Exhausts: although they are defined seperate from subentities, they can be regarded as subentities. |
||
| − | One important thing to remember |
+ | One important thing to remember is that [[Shipdata.plist#frangible|frangibility]] is defined for the main entity, not seperately for every SE. |
| − | + | ||
| + | [[File:Lib MatFinder Pos01.png|right|320px]] |
||
| + | [[File:Lib MatFinder Pos02.png|right|320px]] |
||
| + | [[File:Lib MatFinder.png|right|320px]] |
||
| + | == Tool: Library MatFinder == |
||
| + | Svengali wrote a special add-on for Library - "a helper to set and test materials entries" - which inter-alia enables locating the exhaust and weapons on your ship model. |
||
| + | |||
| + | You need [[Library]] loaded as well. A new '''development''' sub-heading will appear on your docked F4 screen which will allow you to choose any ship model loaded and to analyse it. |
||
| + | |||
| + | '''Warning''': this was cut and pasted here by an ignoramus who recognised its importance, but does not understand any of it! |
||
| + | |||
| + | === Version 1.0 === |
||
| + | "It only works with the plain materials thing at the moment, because I wrote it to migrate from custom shaders to the default shader (as much as possible). Reason is that shader swapping is a 1st class performance killer and getting rid of a few custom shaders is surely a good thing. The tool also disables shaders in use to force use of Oolite's default shader, when the model gets shown on the main screens. It shows the shadered versions though when you can enter values. This is simply to show the difference between both version to give users a chance to get your material as close as possible to the 'original' version." |
||
| + | |||
| + | Multiple weapons are already supported, positions and orientations of subentities is on the to-do list. |
||
| + | |||
| + | === Version 1.1 === |
||
| + | :- Added note by a_c about gloss+specular |
||
| + | :- Choices left aligned |
||
| + | :- Handling for disallowed models via conditions |
||
| + | :- Added Mode: Positions. Handling and logging for aft_eject_position, exhaust, missile_launch_position, scoop_position, view_position_aft, view_position_forward, view_position_port, view_position_starboard, weapon_position_aft, weapon_position_forward, weapon_position_port, weapon_position_starboard. The Positions mode requires shader support to visualize them. |
||
| + | :- Testmode for view_positions |
||
| + | :- Search for entity |
||
| + | |||
| + | For details & download link see the BB thread for his Library.oxp [http://www.aegidian.org/bb/viewtopic.php?p=265554#p265554 here] |
||
| + | |||
| + | == Important comment from a_c == |
||
| + | Decide what your ship should look like early on. Decide on the type of materials you need for each single part of it. Don't just go with it thinking that you just need to "dress it up" with a texture. If you do, it will most likely end up looking like the texture is a piece of coloured paper wrapped around a model. [http://www.aegidian.org/bb/viewtopic.php?p=271594#p271594 Some lighting and material tips] ([[User:Another_commander|Another_commander]] 2020) |
||
| + | |||
| + | == Links == |
||
| + | * [[List_of_software|List of software]] - useful tools. |
||
| + | * [[Oolite_Converters|Converter scripts]] - helpers for models and plists. |
||
| + | * [[Materials_in_Oolite]] - further infos about textures in Oolite. |
||
| + | * [[Quaternion]] |
||
| + | |||
| + | * [http://aegidian.org/bb/viewtopic.php?f=4&t=15156 noob: my own ship] (2013+) - getting started! |
||
| + | * [http://www.aegidian.org/bb/viewtopic.php?p=30982#p30982 Some tips] (2007) by [[User:Arexack|Arexack]] |
||
| + | * [https://www.youtube.com/user/MrDertien/videos YouTube classes in Wings3D] (2013-4) by [[Dertien]] |
||
| + | * [http://aegidian.org/bb/viewtopic.php?p=264830#p264830 Putting it all together] (2018) by [[User:Phkb|Phkb]] |
||
| + | |||
| + | * [[OXP howto texture]] - texturing your new model |
||
| − | [[Category:Oolite]] |
+ | [[Category:Oolite]] [[Category:Factual]] [[Category:Oolite scripting]] |
Latest revision as of 02:41, 3 December 2021
Contents
Create your model
in Wings3D or a similar program.
- For Blender specifically see Blender 3d Modeling Tutorials (2011) - and see also cgcookie.com
How you do this is up to your creativity, but Aegidian has created the following tutorial for Wings3D.
If you've read the tutorial above it's time to think about a few more things.
Optimize
Optimizing models and textures for a game is no fun, specially if it's a model with lots of greebles and funny details.
Simple example
So let's stick with a simple example - a simple cone combined with a cube. When creating the UV-Map in Wings3D this map is really in no way optimized. Doing optimizations as postprocess is a real pain, believe me .-)
Let's say you have created a model in Wings3D (pic 1) and created the UV-Map (pic 2). You can see that Wings3D does some preparations for you, e.g. the UV information is taking place in the maps area and the polygons are separated (in chunks), based on the method you've used to create the UV-Map. It's a good starting point but far away from a optimum for a game.
Wasted texture informations
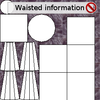
You can see in a few OXPs background images in the UV-Maps (pic 3). This is just wasted texture information, results in bigger filesizes and and makes optimization tools pretty senseless. These tools are using Deflate, LZ77, RLE (Run-length_encoding) and other algorithms to optimize the texture information streams in the maps. Better use a solid color (black, grey or white).
Wasted faces
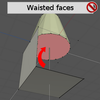
Wings3D is a box-modeller and creating objects in Wings3D always results in closed objects. Result is that quite a few faces are just wasted (pic 4), because they are not visible at all, but still eating memory and processing time. This can easily go in a few thousands of faces when a lot of models are used in installed OXPs. Luckily there's a way as Wings3D provides a hole material. This is a special feature to reduce the amount of data when exporting the model as .obj as the faces won't appear in the exported model and UV-Map.
Resort the map
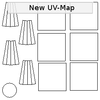
The next step is to resort (and sometimes scale) the polys in the UV-Mapper. Best practice is to leave a little bit space between polys (pic 5). This is a lesson I had to learn with my models. I was always wondering why some artifacts appeard at the edges and why the mipmapping doesn't work properly.
Mipmapping
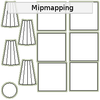
To get it working properly expand the areas with real texture information by a few pixels (pic 6). Oolite will do the mipmapping (if its available) automagically. Mipmapping or Level of Detail (LOD) is a antialiasing technique to improve the quality when textures are minified / magnified. See Mipmap for more infos.
Tesselation is evil
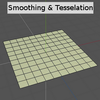
And last but not least tesselation (or subdivision) is evil if its used to smooth objects appearance. We can see it in a growing number of released OXPs, and it is really the worst case. Tesselation (pic 7) is a time eater for a game as it increases vertex and face counts a lot and often enough results in higher texture sizes. Both are adding time to the setup of entities whenever they are spawned in the game. Oolite handles smooth groups and hard/soft edges so in most cases there is absolutely no need to raise v/f counts. A really simple example how to use the smoothing option in combination with materials entries in Oolite can be found in the RVandGS.oxp.
Details and Greebles
Another point to consider is if a detail has to be done in the model itself or if this can be placed in a normal map.
Export the model
to obj( mtl texture) and convert to *.dat format.
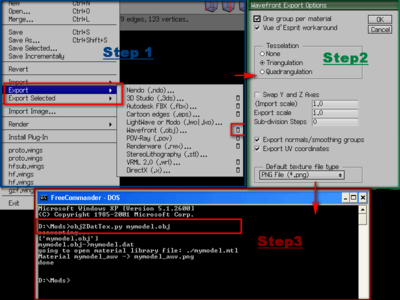
The picture above shows 3 simple steps to export the model and use one of the converter scripts to get the .dat file.
- If you have the Wings stuff ready for export (means a model with UV-Map), simply use the Wavefront (obj) exporter (Step 1+2). You'll need to configure it as shown in Step 2. Once exported you have three files (.obj, .mtl and .png).
- Copy the
Obj2DatTexNorm.pyto your folder where the model has been saved to. - Open a shell and switch to the folder with the model (and script) and type in:
Obj2DatTexNorm.py mymodel.obj(Step 3).
Please note that the converter script Obj2DatTexNorm.py needs Python 2.7 or higher (but doesn't work out of the box with 3.x!!). There is still Obj2DatTexNorm.py available which will work with Python 2.5, but the recommended tool is Obj2DatTexNorm.py.
Edit shipdata.plist
Supply the in-game values relevant to your model.
Subentities
Entities can have sub-entities, which are defined by quaternions. There are several types of SE:
- Model Entities: can be any model, with any properties.
- Turrets: are a specialised model entity.
- Flashers: blinking lights
- Exhausts: although they are defined seperate from subentities, they can be regarded as subentities.
One important thing to remember is that frangibility is defined for the main entity, not seperately for every SE.
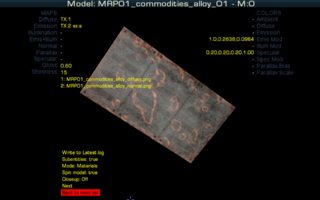
Tool: Library MatFinder
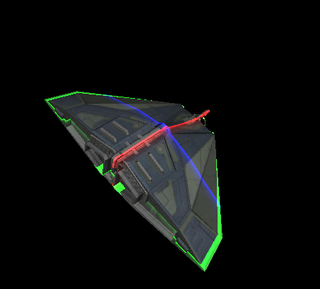
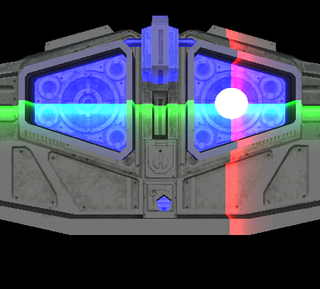
Svengali wrote a special add-on for Library - "a helper to set and test materials entries" - which inter-alia enables locating the exhaust and weapons on your ship model.
You need Library loaded as well. A new development sub-heading will appear on your docked F4 screen which will allow you to choose any ship model loaded and to analyse it.
Warning: this was cut and pasted here by an ignoramus who recognised its importance, but does not understand any of it!
Version 1.0
"It only works with the plain materials thing at the moment, because I wrote it to migrate from custom shaders to the default shader (as much as possible). Reason is that shader swapping is a 1st class performance killer and getting rid of a few custom shaders is surely a good thing. The tool also disables shaders in use to force use of Oolite's default shader, when the model gets shown on the main screens. It shows the shadered versions though when you can enter values. This is simply to show the difference between both version to give users a chance to get your material as close as possible to the 'original' version."
Multiple weapons are already supported, positions and orientations of subentities is on the to-do list.
Version 1.1
- - Added note by a_c about gloss+specular
- - Choices left aligned
- - Handling for disallowed models via conditions
- - Added Mode: Positions. Handling and logging for aft_eject_position, exhaust, missile_launch_position, scoop_position, view_position_aft, view_position_forward, view_position_port, view_position_starboard, weapon_position_aft, weapon_position_forward, weapon_position_port, weapon_position_starboard. The Positions mode requires shader support to visualize them.
- - Testmode for view_positions
- - Search for entity
For details & download link see the BB thread for his Library.oxp here
Important comment from a_c
Decide what your ship should look like early on. Decide on the type of materials you need for each single part of it. Don't just go with it thinking that you just need to "dress it up" with a texture. If you do, it will most likely end up looking like the texture is a piece of coloured paper wrapped around a model. Some lighting and material tips (Another_commander 2020)
Links
- List of software - useful tools.
- Converter scripts - helpers for models and plists.
- Materials_in_Oolite - further infos about textures in Oolite.
- Quaternion
- noob: my own ship (2013+) - getting started!
- Some tips (2007) by Arexack
- YouTube classes in Wings3D (2013-4) by Dertien
- Putting it all together (2018) by Phkb
- OXP howto texture - texturing your new model
