Decal
| The word is short for decalcomania, which is the English version of the French word décalcomanie.
The technique was invented by Simon François Ravenet, an engraver from France who later moved to England and perfected the process he called "décalquer" (which means to copy by tracing); it became widespread during the decal craze or mania of the late 19th century... |
| (Wikipedia) |
A number of the Oolite ships either come with decals, or allow for decals to be easily applied.
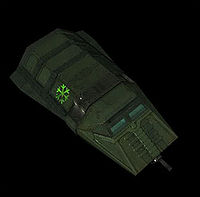 Griff adder with green decal |
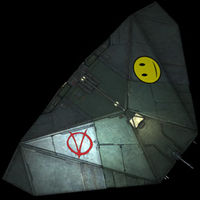 Griff cobra with two decals |
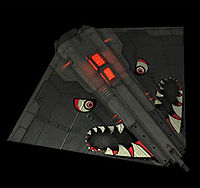 Griff gecko with sharkteeth decal |
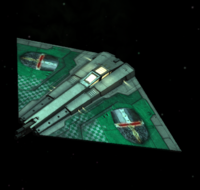 Green Gecko with knight's helmet decals |
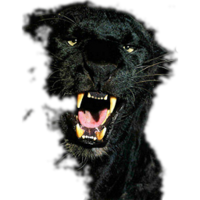 Jaguar Company decal |
Contents
Griff on Changing Decals
Yes there is a way to change your ship decals: it's just a single .png format graphic file that you can swap for your own .png
Finding the file Oolite uses is a bit more complex now we're in the days of managed expansion packs though :)
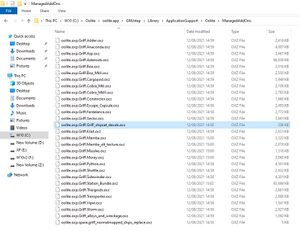
I'm on Windows. I install the 'griff ship bundle' from the Oolite expansion manager, and then open file explorer and navigate to:
- C:\Oolite\oolite.app\GNUstep\Library\ApplicationSupport\Oolite\ManagedAddOns
I see the list of all my installed expansion packs in oxz format. The one we need to find is called oolite.oxp.Griff.Griff_shipset_decals.oxz
To open the oxz we need to change the file extension from .oxz to .zip
Once that's done we can double click on the file and it should open up and let us look inside.
In the Textures folder there's a png called griff_decals_player.png ...
...replace that file with your own custom decal png image, you'll need to keep the exact filename and filetype otherwise Oolite will not be able to locate your new decal as it's name is hardcoded in the 'plist' files in all the ship expansions
Keep your new decal to a 'power of 2' resolution, this is something like 256x265 pixels in size or 512x512 pixels etc
Once you're done replacing the png, make sure to change the file extension back from .zip to .oxz and restart oolite.
The ship decal should have changed, if not, exit Oolite and start it again holding down the Shift key on your keyboard from the moment the program starts loading up until the spinning cobra title screen appears - holding down shift in this way forces Oolite to clear its cache and reload all it's known expansion pack files again and so it will see any changes we've made to the files
Changing decal sizes and positions
If you want to change decal sizes and positions on the ship hull, you'll need to locate the oxz for that particular ship in
C:\Oolite\oolite.app\GNUstep\Library\ApplicationSupport\Oolite\ManagedAddOns
change the file extension to zip as above, then open the folder and look for the shipdata.plist file in the Config sub-folder. open it in a basic text editor (not wordpad if on a PC as it mangles the file with hidden formatting data, notepad is OK to use, as well as the notepad++ opensource text editor)
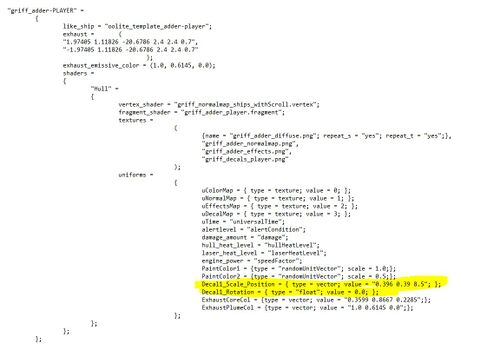
in the file there will be a list of settings for the '..-Player' version of the ship, look in the Shaders, Uniforms bit for the decal rotation and position settings:
What these settings mean
Decal1_Scale_Position = { type = vector; value = "0.396 0.39 8.5"; };
Decal1_Rotation = { type = "float"; value = 0.0; };
The 3 numbers in Scale_position are x-pos, y-pos, scale
- Scale is weird in that the smaller the number you use the bigger your decal is drawn on the ship.
- Note that the x and y positions refer to the ships texture image not the actual model mesh dimensions.
- I think that in OpenGL, the bottom left corner of the image is 0.0 and opposite top right corner is 1.0: so an x y pos of "0.25, 0.5" is 1/4 of the way in from the left edge of the image and halfway up from the bottom. The skill is finding the right place where this would mean that the decal is actually drawn on the hull!
Links
- Instructions on adding decals to Griff ships (2021)
- Some decal resources (dug up by Griff):
- Daddyhoggy's experiments (1) } to remove the annoying watermark, dig up the original pictures from Photobucket
- Daddyhoggy's experiments (2) } using the reply with quote button to access the originals (thanks, cbr!)
