Blender Planet Textures
Blender Generator File for Oolite Planet Textures
NOTE: This page predates the major changes to planetary possibilities in v.1.88 & v.1.90: See http://www.oolite.org/whatsnew/v1.88/ & http://www.oolite.org/whatsnew/v1.90/ and for more detail see A Description of the Improved Lighting and Materials System (2018+)
This file: planet_oolite.blend can be used to generate planet textures in Blender. Made by Commaander X together with the following notes and tutorial.
Couple of extra comments:
- don't left click in the 3D View window, or the UV/Image Editor. Left click originally changes the position of 3D cursor. Selection is done by right clicking.
- the generated textures are cube mapped (this avoids the nasty pole distortion the "latlong" textures expose)
- the blend file can be used to generate the 2048 (or more) textures you wanted. The most challenging part is to come up with enough gradient variations for different planet types and also define a way (shouldn't be that hard) to procedurally generate the crater-ed barren planets/moons. The horizontal distortion for the gas giants should also be trivial.
With proper animation settings (i.e. changing various texture parameters frame based), each frame of the animation would become a different planet texture.
Contents
1. Scene Presentation
There are 3 added objects:
- Sun - a sun light used for being able to see the specular maps (not used in Oolite)
- present in both layer 1 and 2
- bge - a cubemapped sphere to test the generated textures in the BGE (Blender Game Engine)
- present only in layer 2
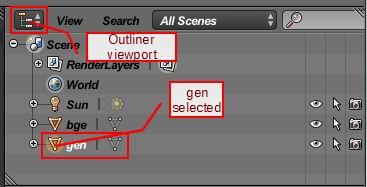
- gen - a cubemapped sphere to generate the textures
- present only in layer 1
2. Generating Textures
I. Viewing
The textures are generated by using the "gen" object. To see it with texture settings:
a) in the "3D View" viewport select layer 1
b) in the "Outliner" viewport select the "gen" object
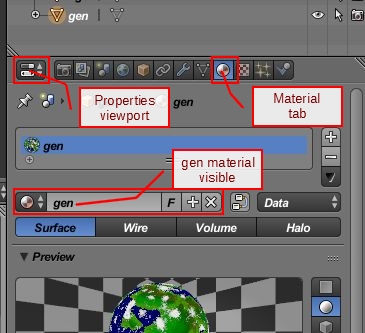
c) in the "Properties" viewport select the "Material" tab, and confirm the "gen" material is visible
d) in the menu view, select "Blender Render" as engine to use for rendering
e) in the "3D View" viewport select "Rendered" as the viewport shading method
You should be able to see the textured "planet" in the "3D View" viewport.
II. Changing
The "3D View" viewport should show how the textures defined on the "gen" material will look on the planet object.
To change the generated texture parameters:
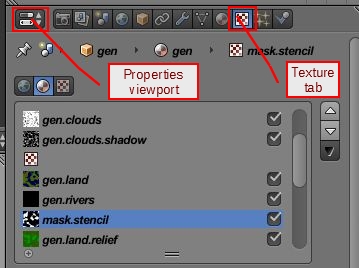
a) (having 2.c) above performed)in the "Properties" viewport select the "Texture" tab
b) in the list of textures, the following are of interest:
- gen.clouds - used to generate the cloud pattern atop of all the other textures
- gen.clouds.shadow - used to generate a shadow for the clouds texture
- gen.land - used to generate the main land layout of the planetary texture
- gen.rivers - used to generate rivers across the continents
- mask.stencil - used as a stencil for placing variation of the initial relief color as defined in gen.land
- gen.land.relief - used to put through the mask.stencil more variation of the relief layout
There are more textures, but they can be ignored (and keep unchecked in the list)
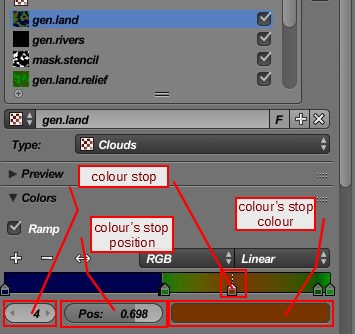
In order to change the layout of the generated map for each texture there are 2 main places in the "Colors" section (below the texture list) to modify:
- in the colour gradient (Ramp), the colours for each colour stop
- in the colour gradient the positions for each colour stop
Some position values are interconnected -- e.g. in the mask.stencil texture, the colour stop at position 1 should have the same position value like the colour stop at position 1 in gen.land, in order to place the extra relief on the continents and not in the oceans.
III. Generating
In order to generate the texture:
a) make sure your textures for the "gen" object look good in the "3D View" viewport
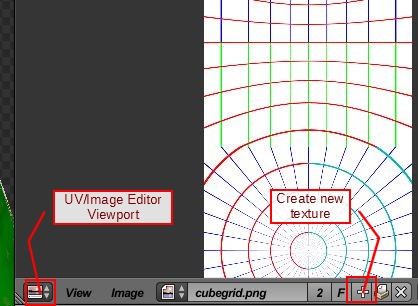
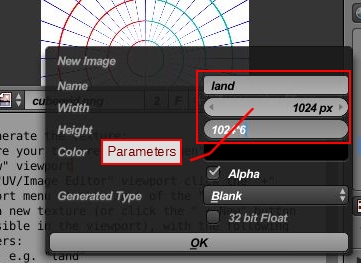
b) in the "UV/Image Editor" viewport click the "+" button in the viewport menu at the right of the "cubegrid.png" in order to create a new texture (or click the " + New" button if no texture is visible in the viewport), with the following (mandatory) parameters:
- Name: e.g. "land"
- Width: 1024
- Height: 6144
HINT: if you want to change the size of the generated texture, you can enter the new width (e.g. 512) and enter the width value times 6 in the Height field (e.g. 512*6); Blender will put in the result.
c) select the "gen" object in the "Outliner" viewport
d) select "Edit Mode" in the "3D View" viewport
e) select all (menu)"Select"/"(De)select All" (might be needed couple of times)
f) make sure the newly created texture is selected in the "UV/Image Editor" viewport under the highlighted UV grid (you should see the highlighted UV grid as a result of e) action)
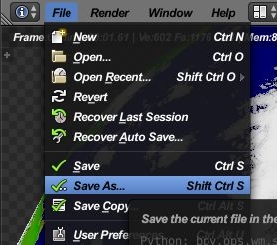
g) save the file (maybe as a different name -- you can click the + sign at the end of the file name in order to quickly add/increase the file number)
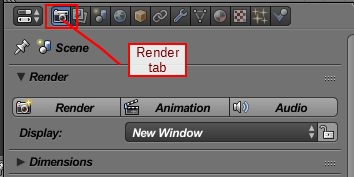
h) in the "Properties" viewport select the first tab, "Render"
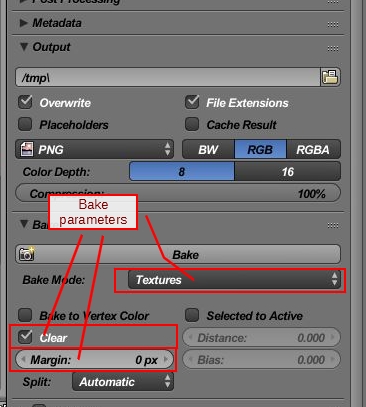
i) in the "Render" tab scroll down to the "Bake" section, select "Textures" as "Bake Mode" and make sure "Clear" is checked and the "Margin" is set to 0 px
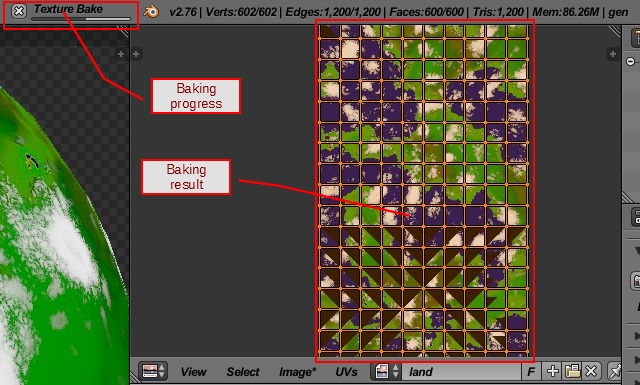
j) click "Bake" button -- in the "UV/Image Editor" viewport you should see how the texture gets generated.
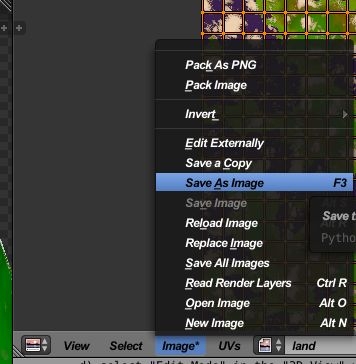
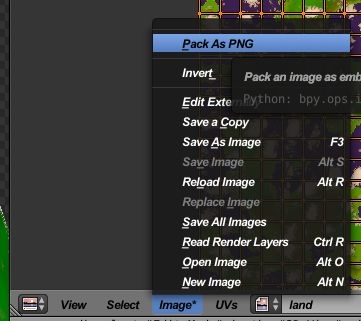
k) in the "UV/Image Editor" viewport you can save the generated texture as an image to test in-game; you can also pack the image as a PNG to easier test it in the BGE.
3. Testing the Generated Textures
In order to make it easier to see how the textures would look in-game:
a) the generated images (in the "UV/Image Editor" viewport) should be (menu)"Image/Pack as PNG"
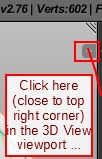
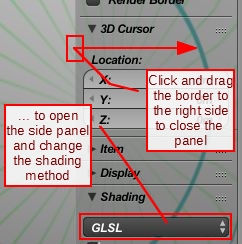
b) switch main "3D View" viewport to layer 2 (you might need to switch back to "Object Mode" -- see 2.III.d) above). You also must make sure you shading is set to GLSL and Viewport shading to texture.
c) in the menu view, select "Blender Game" as engine to use for rendering
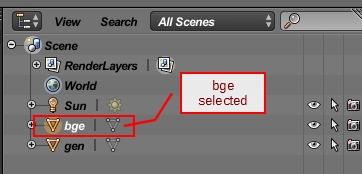
d) select the "bge" object in the "Outliner" viewport
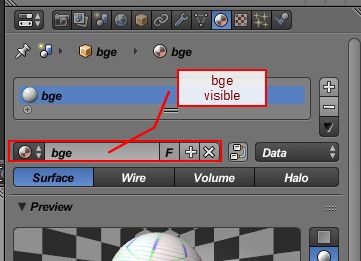
e) select the "Material" tab in the "Properties" viewport, and confirm the "bge" material is visible
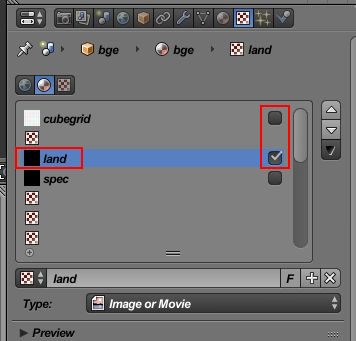
f) select the "Texture" tab in the "Properties" viewport
g) uncheck the "cubegrid" texture
h) check the "land" texture; select the "land" texture
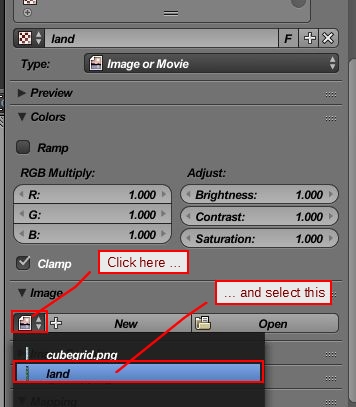
i) in the "Image" section below the texture list, select the image name (as given when generated) in the list opened by clicking at the left of the "New" button
You should see in the "3D View" viewport how the texture looks in BGE mapped on the "planet". The quality will differ, though, from how it will look in-game in Oolite.
Once the texture is in the file, only the a)-d) steps above are necessary to see the new texture. NB: you'll have to do 3.a) (pack as PNG) after you generate a new version of the texture, to be able to see it in BGE.
Links
- You can comment in this topic.

