Difference between revisions of "Telescope"
m (→Quick start as hunter for a fast try) |
m (→Quick start as hunter for a fast try) |
||
| Line 7: | Line 7: | ||
* Copy the .oxp folder to the AddOns directory, hold down the Shift when start the game first time after copy. |
* Copy the .oxp folder to the AddOns directory, hold down the Shift when start the game first time after copy. |
||
| − | * Buy Telescope and Gravity Scanner equipment or load the included savegame "Telescope demo.oolite-save". [[Fuel Injectors]], [[ECM]], [[Fuel Scoops]], [[Military Laser]] and [[Scanner Targeting Enhancement]] are used also in this guide. |
+ | * Buy Telescope and Gravity Scanner equipment or load the included savegame "Telescope demo.oolite-save". [[Witch Fuel Injectors]], [[ECM]], [[Fuel Scoops]], [[Military Laser]] and [[Scanner Targeting Enhancement]] are used also in this guide. |
* Undock (F1) to se the magnified target in top center position. |
* Undock (F1) to se the magnified target in top center position. |
||
* Turn off your weapons with '''underscore (_)''' to show distant targets also. |
* Turn off your weapons with '''underscore (_)''' to show distant targets also. |
||
Revision as of 16:27, 11 July 2013
This OXP realize some of the requests for an extended scanner described in this forum topic.
You can download it from here.
Contents
Quick start as hunter for a fast try
- Copy the .oxp folder to the AddOns directory, hold down the Shift when start the game first time after copy.
- Buy Telescope and Gravity Scanner equipment or load the included savegame "Telescope demo.oolite-save". Witch Fuel Injectors, ECM, Fuel Scoops, Military Laser and Scanner Targeting Enhancement are used also in this guide.
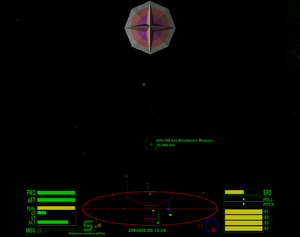
- Undock (F1) to se the magnified target in top center position.
- Turn off your weapons with underscore (_) to show distant targets also.
- Turn your ship where you see the many brown lollipops on your IFF scanner. The autolock will countinually change the box to the most centered target.
- Use Injectors (i) to fly closer until you can see a Red ball which means visible ship with bounty. Do not hunt Yellow traders and Purple police ships if you want to remain in clean status.
- Choose your enemy for the strength of your ship: start with a small ship flying alone.
- Stop your fly when just arrive under 30km.
- Use Ctrl+arrow keys to put the target into the middle of the crosshairs to turn on the sniper ring which magnify the difference from the correct line-up.
- Turn on your weapons (_) and fire (a). You can try to hit and a stopped target will turning when successful, but if your target is too small then fly inside 25600km where the red target box indicate the correct line-up.
- Press ident (r) to lock another target if there are more. You can switch between the two most centered if repeated. In red alert will lock targets which target you only.
- Telescope can be primed (Shift+N) then activate (n) button will step to the next target, mode (b) steer your ship to the direction of the target.
- If a missile is coming then a Cyan ball warn you: start ECM (e), target it (t) and try to avoid (i) or shoot it (a).
- If you win and pilot is ejected then shot down the derelict ship to get the bounty, then fly after the small White balls and scoop the Escape Pod, metal fragments and cargo pods.
- Fly back to the station and dock to get the reward for the pilot and sell cargo (F8). Congratulations, you are richer. :)
Telescope Equipment
Can determine the direction, distance, orientation and legal status of all visible ships. The detection range based on the size of the target, when the core game set it to isVisible.
For example you can see:
- Adder at 32 km,
- Viper and escort ships around 50 km,
- Anaconda, Boa, Cobra MkIII and Python about 100 km,
- Rock Hermit in almost 500 km (if not visible from the Main Station then fly around a to find),
- Coriolis Station at 1100 km (right from the witchpoint).
Visual targeting
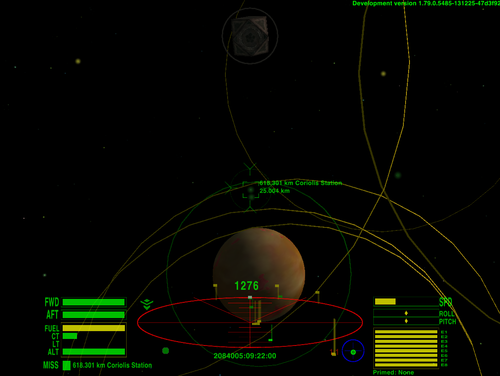
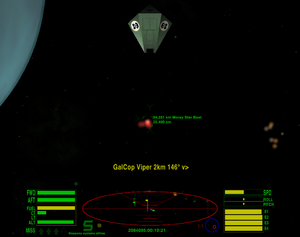
The virtual model of the target ship is displayed and a console message show the name, range and direction. The direction marked by <^ or v> symbols to read faster than the Port Up or Down Starboard words. The ranges and directions calculated continually to help turn in line and see the decreasing range while travel to the target. The orientation of the model is equal with the target if you centered it and you can spin the model if turn around your ship. You can set the size of the model with the $TelescopeVSize variable in the Scripts/telescope.js.
Lightballs
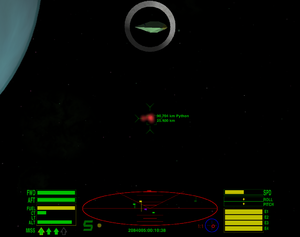
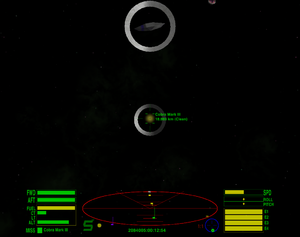
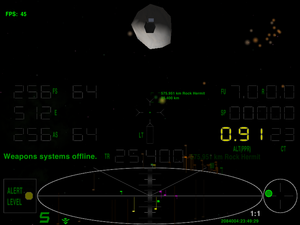
Far targets get coloured lightball markers in the view and lollipops with darker colours near the edge of the scanner.
- Red: Hostile ship with bounty (pirates and thargoids),
- Yellow: Neutral ship with clean status (traders and co),
- Purple: Police,
- Cyan: Missile or Mine,
- Green: Buoy or Station,
- Blue: Wormhole (from Oolite v1.79),
- White: Cargo, Escape Pod or Delerict ship,
- Gray: last known position of a lost target (moved out of the telescope range),
- Orange: Gravity Scanner (see below) detected ship too far to be visible,
- Brown: Gravity Scanner detected ship under 130t mass (less dangerous, especially with ShipVersion OXP).
Beacons identified in the whole system due to the transmitted radio broadcasts. If a ship transmits beaconcode then detected anywhere but colored as a ship and turn to orange if too far to be visible.
The current target is marked with a gray "shadow" lollipop at the edge of the IFF scanner also to help determine the direction, especially at close range to avoid the scanner zooming.
If the target is closer than 1000m then the lightball will be removed due to ships already cover the ball and cargoes is enough large to detect with your eyes, but the shadow lollipop still remain. You can set the minimum distance with the $TelescopeVMarkMinDist variable in the Scripts/telescope.js.
Targets within the range of the Military Laser (30km) marked with a larger ball and normal (not darker) colored lollipop. You can use this feature to determine where you can open fire exactly if the target is enough large to be chance to hit.
Red Alert show targets within 30km only to save CPU and do not disturb you with others.
You can disable the lighballs of the ships with set $TelescopeLightBalls to false, but non-ships with Blue, Cyan, Gray, Green and White colours will be remain to help find these. Auto targeting functions still can lock far targets, seems to be an empty box but the ship are in.
Sniper ring
If you almost lined up with your target who is between 15 and 30km then a ring will appear. The move of this ring magnify the variance of the correct line-up to help fine aim. You can hit if the target box of the Scanner Targeting Enhancement switch to red.
Snipers can use the distances between 25.6 and 30km to fire before the enemy can see the attacker on the scanner. It was possible without Telescope also, but the size of the ball give another help to know when run the target out of the range and the ring can help to hit without red box which is working in the normal scanner range only.
If you think this is a cheat then fire only when the target can see you also or set the $TelescopeSniperRange variable to 25600 which will shorten the appear of the ring and the largest ball (but no way to shorten the range of the Military Laser).
Auto steering
The mode button ("b") turn on the auto-steering (after primed Telescope with Shift+N): if your ship fly in line (not turning) then turn to the target, but stop instantly if you touch the controls and before the correct line-up so will not aim instead of you. Useful if the target moved out of the screen, you can get back faster than manually.
Auto scanning
Telescope check new targets in every second and perform autoscan if found one: simple light sensors can see new dots in the whole sky without energy usage but must zoom with the main scope to determine the ship type which need 2 energy points. The autoscan can be turned off if the $TelescopeAutoScan set to false in the telescope.js but usually worth the cost to get new informations sooner.
Far target locking
You can lock far targets also which is not in the normal scanner. The distance showed before the name of the ship with Scanner Targeting Enhancement due to the the second line show the range of the virtual marker only (which is always near the edge of the IFF Scanner). Must to use this workaround because the core game do not allow to lock targets out of the normal scanner so the locked marker seems to be the lock of the target (can fix in the core only).
If you can not see a ship then the ship maybe destroyed, jumped, flyed farther than the visible range or has Military Scanner Jammer and you has not Jammer Filter so can not get target lock.
When fly too far and lost the target then the telescope rename it to Lost target until next scan.
Keypress functions
Target the next ship with prime Telescope (Shift+N) then press the activate button ("n"). Hostiles listed first if any, then all ships in normal scanner (25.6km), then Cargo and Escape Pods. After all near items show ships which is not in the normal scanner.
The ident button ("r") got a new feature from Telescope: can lock the most centered target out of the crosshair also. Next time can lock the second centered if the most centered is not changed. Third time lock the first again. In Red Alert lock the most centered target which target you if any, and can lock these only to help avoid friendly fire.
Works only if was a locked target before due to triggered by the shipTargetLost event and if no target then nothing lost and not called. Press "r" a few more time to make sure then get something into the crosshair or use equipment buttons to lock a target.
If you turn off the weapons with the underscore button ("_") then a scan happen and you enter to the "Navigation Mode" where autolock help to see through targets: continually relock to the most centered target. This button is choosed to avoid unwanted fire if you have turrets. In Red Alert you can lock any target and see far targets if turn this mode on.
Gravity Scanner Equipment
Extend the detection range of the Telescope using mass detector scaled by the third power of the distance: the mass of the target in kg must be larger than d*d*d/100 where d is the distance in km.
km  ->	t		t  ->	km
100	10		30	144
200	80		50	171
300	270		100	215
400	640		150	247
500	1250		200	271
600	2160		500	368
700	3430		1000	464
800	5120		2000	585
900	7290		5000	794
1000	10000		10000	1000
Detection of the player ships and the Hard versions in HardShips OXP:
		t	km	Hard t	km
Adder   	11	103	23	132
Moray   	40	159	81	201
Cobra Mk I	47	168	94	211
Fer-de-Lance	51	172	102	217
Asp     	59	181	118	228
Boa Mk2 	182	263	365	332
Cobra Mk III	186	265	371	333
Boa     	192	268	385	338
Python  	222	281	445	354
Anaconda	430	350	1289	505
Beacons detected in the whole system and Rock Hermits usually also (from 1800km).
Gravity scanner works only when you turn off your weapons with underscore ("_") button, else visible targets displayed only. You can define a more comfortable key in the Oolite/oolite.app/Resources/Config/keyconfig.plist file.
Featuring auto-relock which contiunually change your target to the most centered target, so the box will jumping during you turn your ship to help browse the many targets. The ident ("r") button can lock the same target only in this mode, can not step to the second centered target.
Gravity scan consume 8 energy points (visual scan use 2 only). You can hear the sound of the Gravity Scanner when scanning which is remind to the energy usage also.
Orange and Brown lollipops and lightballs marks the detected targets out of the visible range. Brown if the ship is under 130t mass which means small ships, usually escorts - avoid Oranges and target single Browns until your ship is not very strong. The mass usually can not tell about a ship is pirate or not, colored identification need visual contact.
If you see a lighter ball then there are two or more ship in the same place. The smallest orange and brown ball means the target is farther than 150km, these get dark orange and dark brown lollipops.
Gravity Scanner can not determine the orientation. If the target is not visible then the view position of the visual model will be fixed from the top.
The activate ("n") and mode ("b") button of the Gravity Scanner is not the same with the Telescope, but usable as to step forward and back in the list and always steer to the target (except if you comment out the Steer() lines from the gravscannereq.js). If you want to lock an on-screen target without steer then you can still use the ident button ("r"). New scan happen if you step over the end of the list or when you turn off your weapons.
When the core game provide more equipment buttons then a direct scan button can be assigned (maybe Ctrl+n). Another new equipment button (maybe Ctrl+b) planned to turn off the visual model of the target ship.
You can prime and use buttons of the Telescope equipment also due to the target list is the same and contains all detected target regardless of what equipment is primed.
No passive gravity sensors so AutoScan will happen only if a new target arrive into the visible range. When you undock or arrive to a new system then telescope scan performed automatically but if you want to scan the final frontier then you must turn off your weapons.
Large Dish Equipment
Detect ships from double range, for example Anaconda at 700km which is more than the usual witchpoint-planet distance. Another advances that all Cargo and Escape Pods will be detected in 50km and all ships in 100km.
Ships over 1000t (Hard Anaconda and big OXP ships) can use the hull mass to refine the gravity signals to reach 4 times range than without Large Dish, plus all cargo detected in 100km and all ships in 200km.
Need Gravity Scanner, it is a big piece of metal alone. Can fit into ships over 130t mass only (Cobra III and co.) due to the size.
Fast CPU can draw many (around 100) targets without relevant FPS drop, slow systems draw it also but with drop (tested on Intel Atom netbook). In this case turn on Gravity targets if needed only and turn off when reached Telescope range.
This is not a primable equipment (there are no buttons on the pure alloy) and a passive extension so will not increase the energy usage of the scan.
Technical Informations
Depending on Oolite v1.77. No shaders needed.
Instructions
Unzip the file, and then move the folder named ".oxp" into the AddOns directory of your Oolite installation. Savegame included: put the "Telescope demo.oolite-save" file into the oolite-saves directory any load it.
Problems
- If you see a question mark as visual target of a ship then you probably installed a custom ship OXP. The core game currently do not support to make visual effects from ships directly, but there is a workaround: copy the Config/shipdata.plist files in your OXPs to effectdata.plist or insert into the full contents if exists to avoid overwrite.
- If still not appear but the ship using like_ship then copy the model = "filename.dat"; from the original ship into the section of this ship. Original cobras arrived after I do this only.
- If a custom ship use shaders with uniforms then you may see errors in the log but the visual target usually appear with less detail (need several core improvements to fix properly). To avoid the errors you can try commenting out the referred lines with // from the effectdata.plist or replace the inputs with fix numbers based on the wiki. For example the Griff Boa ( http://wiki.alioth.net/index.php/Griff_Boa ) is included in the effectdata.plist file of the Telescope OXP.
- If you ride a custom ship and the visual target is misaligned (not in the top center position) then copy the view_position values from your shipdata.plist into the $ShipLibViewPosition array in Scripts/shiplib.js . From Oolite v1.79 the player.ship.viewPositionForward property solve this.
- Opened wormholes are not targetable. You can put a box around it but the script receive an empty target only. Can not get a pointer from the list of allShips nor allVisualEffects in v1.77 but from v1.79 there is an isWormhole flag.
- If a ship fly over a station then the lightball hide behind the station. To solve this need resizeable flashers which will be available from Oolite v1.79 only.
- Right after undock or hyperjump the first ident press can not target the most centered ship, only the second press. The first is not call any event, so you must press "r" more time.
- Distant targets write double message when locked, sometime the first show the name of the previous target. This seems to be a problem in the core game (tryed to log it but only one log line created). Simply ignore the first message.
License
This work is licensed under the Creative Commons Attribution-NonCommercial-ShareAlike License version 3.0. If you are re-using any piece of this OXP, please let me know by sending an e-mail to norbylite at gmail.com.
ScanSound source: http://soundbible.com/878-Martian-Scanner.html
Changelog
- 2013.06.17. v0.8 - Lightballs and shadow lollipop added.
- 2013.06.10. v0.7 - Visual targeting and Auto steering added.
- 2013.05.05. v0.6 - Minor fixes.
- 2013.04.08. v0.5 - First working version.
- 2013.03.31. v0.1 - First test files.
Download from here.
Quick Facts
| Version | Released | License | Features | Category | Author(s) | Feedback |
|---|---|---|---|---|---|---|
| 0.8 | 2013-07-10 | CC-BY-SA 3 | extended targeting and scanning | Equipment OXPs | Norby | BB-Link |
